Burger Buns
Have you had a “hamburger” before? It’s like a meat “patty” on a pillowy, soft bun. They’re pretty interesting sandwiches!! But seriously, folks—this bun recipe is so nice and simple, you’re going to forget that the store ones are like $2 for an 8-pack. Let’s get started.
Neven’s Burger Buns
Servings: 8
Time: 15 min mix + 3.5 hr proof + 20 min bake + 20 min cool
INGREDIENTS
- 200 g all-purpose flour
- 250 g high-gluten (bread) flour, or more APF
- 8 g salt
- 20 g sugar
- 7 g (one package) instant yeast
- 125 g lukewarm water
- 115 g milk
- 1 egg
- 45 g butter, at room temp
More info about the ingredients follows after the recipe.
DIRECTIONS
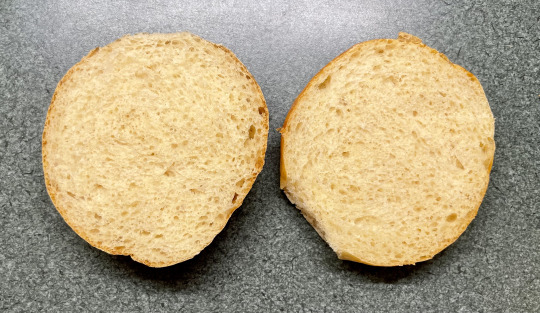
In the bowl of your stand mixer, stir together the flours, salt, sugar, and yeast. Add the water, milk, and egg, but not the butter. Attach the bowl to the mixer equipped with the dough hook attachment. Start the mixer on the lowest speed and mix for 2 minutes, then stop and scrape down the sides, releasing the dough ball from the dough hook. Go up to the next higher speed, and start adding the butter in small pads—toss one in, wait for it to get fully mixed in and no longer visible, then add more. This may take 3-5 minutes. When all the butter is added in, go one speed higher on the mixer again and mix for another 2 minutes. The dough will be smooth, stretchy and a little sticky.
Transfer the dough to another, large, lightly oiled bowl (I like a wider, shallower container for this) and cover. Leave on the counter for 2 hours; it will need a little less time on a very hot day.
Once the dough looks smoothly inflated and doubled in size, move it to a work surface (a clean workbench or a cutting board). Use a bench scraper or knife to cut the dough into ~108 g balls. Shape each into a ball by pulling the sides towards the middle and pinching together, then flip it over and roll on the counter to form a smooth top and a bottom sealed together by rolling. (This video of pizza-ball shaping will be instructive.) Place these balls on a half-sheet pan (18″ x 13″) and cover with a clean, non-terry towel. Rest for 60-90 minutes.
30 minutes before the second proof is done, preheat your oven to 425ºF with a rack in the top third.
When the buns looks very large and puffy, uncover them carefully. From this point on, don’t poke or move them; they’re filled with gas and we want to keep them that way. All that’s left is to egg-wash them. Beat one egg, then gently brush some onto each bun. Go for even coverage in as thin a layer as you can manage.
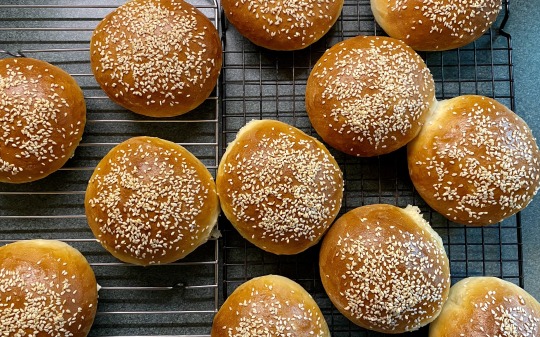
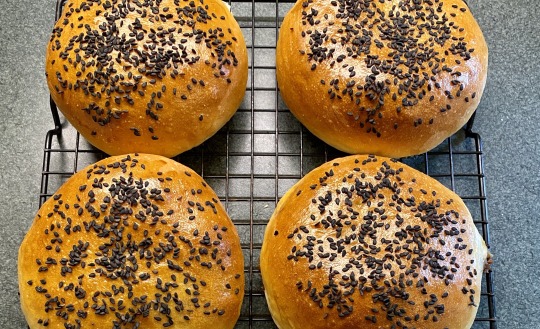
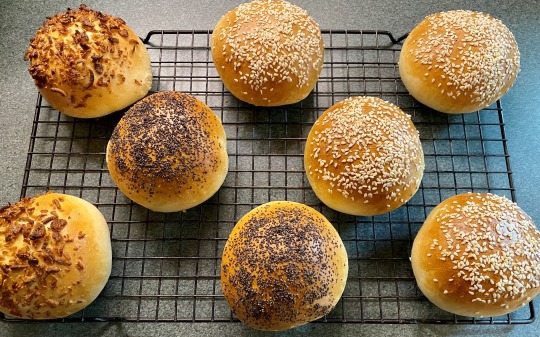
If you’d like to add toppings at this point, go ahead. Sesame seeds, poppy seeds, onion—the sky’s the limit.
Pop the sheet pan into the oven and set a timer for 15 minutes. Rotate the pan after 7-8 minutes. At the end, check that the buns are large, golden, and irresistibly shiny; you may have to add another 2-5 minutes to the bake, or not.
Move each bun carefully to a cooling rack and let them fully cool, at least 20 minutes. They’re now ready to use or store for a day or two. They also freeze beautifully and thaw out on the counter overnight just fine.
Ideally, griddle them in butter before using for a sandwich.
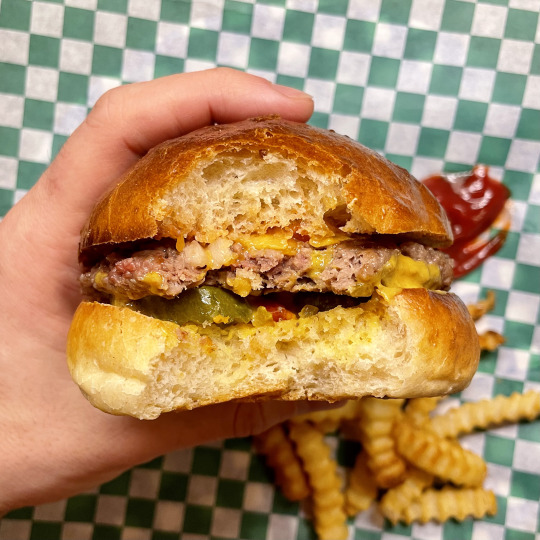
I refuse to discuss what you do with the rest of your burger because I don’t want Internet drama.
HELPFUL INFORMATION YOU MAY ASSUME IS SPONSORED CONTENT AT THE BOTTOM OF THE POST BUT IT’S NOT, IT’S REALLY NOT
- What’s with the high-gluten flour? This is the baker’s “secret,” a flour that gives you that strong, chewy crumb bakeries achieve. You likely won’t find anything labeled “high-gluten flour” in stores. You could buy “bread flour” there, or shop at your local restaurant-supply store! Like you’re a restaurant!
- My favorite commercial yeast is Saf-Instant brand. Buy a big thing of it and keep it in the freezer; use straight out of the freezer. By the way, that restaurant-supply store will likely carry it.
- Can you make this without a stand mixer? Hm maaaaybe, but it’s going to take a solid 30 minutes of hand-kneading. See, this is an enriched dough, meaning it contains things like milk and eggs. To get those really integrated into the final mix, you need to knead a lot. The dough should be utterly smooth by the end, with the butter fully incorporated. It’s doable, though—I believe in you!
- When proofing, you can use a towel, or one of these sweet proofing bags.
- For sliders, shape twelve buns, ~72 g each. Or if you’d like 12 burger buns, 1.5x the recipe, but watch out when spacing them on the half sheet pan. Or use a Big Sheet!
- I’ve successfully replaced the milk in this recipe with buttermilk for a tangier taste.