Neven’s Focaccia
My love for pizza overlaps my love for focaccia. They’re both tremendously satisfying breads, elevated to godly heights by their toppings. Focaccia is the perfect bread because it’s trivial to make; it keeps well; it can become pizza; and everyone’s a fan of its oily, cloud-like qualities. This is going to be so simple and tasty.
Neven’s Focaccia
Servings: 4
Time: 10 min mix + 8-12 hour proof + 5 minute shape + 3-6 hour proof + 20 minute cook
INGREDIENTS:
- 350 g all-purpose flour
- 150 g high-gluten flour (or more APF)
- 10 g salt
- 400 g water
- 75 g ripe-and-ready sourdough starter
- 20 g olive oil
DIRECTIONS:
The night before you intend to bake the focaccia, do the following:
In a very large nonreactive bowl (meaning, stainless steel, glass, or plastic, but not aluminum) add the flours and the salt; stir. Pour the water into the middle, then add the starter to it. Using a large spatula, stir and fold the whole mess for a bit; then add the olive oil. Stir and fold some more, until it becomes a basically coherent mass and there’s not a huge pool of dry flour at the bottom of the bowl. This should only take a minute; you’re not trying to knead dough, you’re just making the shaggy ball a little uniform.
Cover well and rest for 30 minutes to an hour. Come back to it and, using the spatula or a flexible scraper, fold the ball on itself from each side, just to make it a little more uniform. Observe that it will already look smoother and more dough-like, though it’ll still be rather homely.
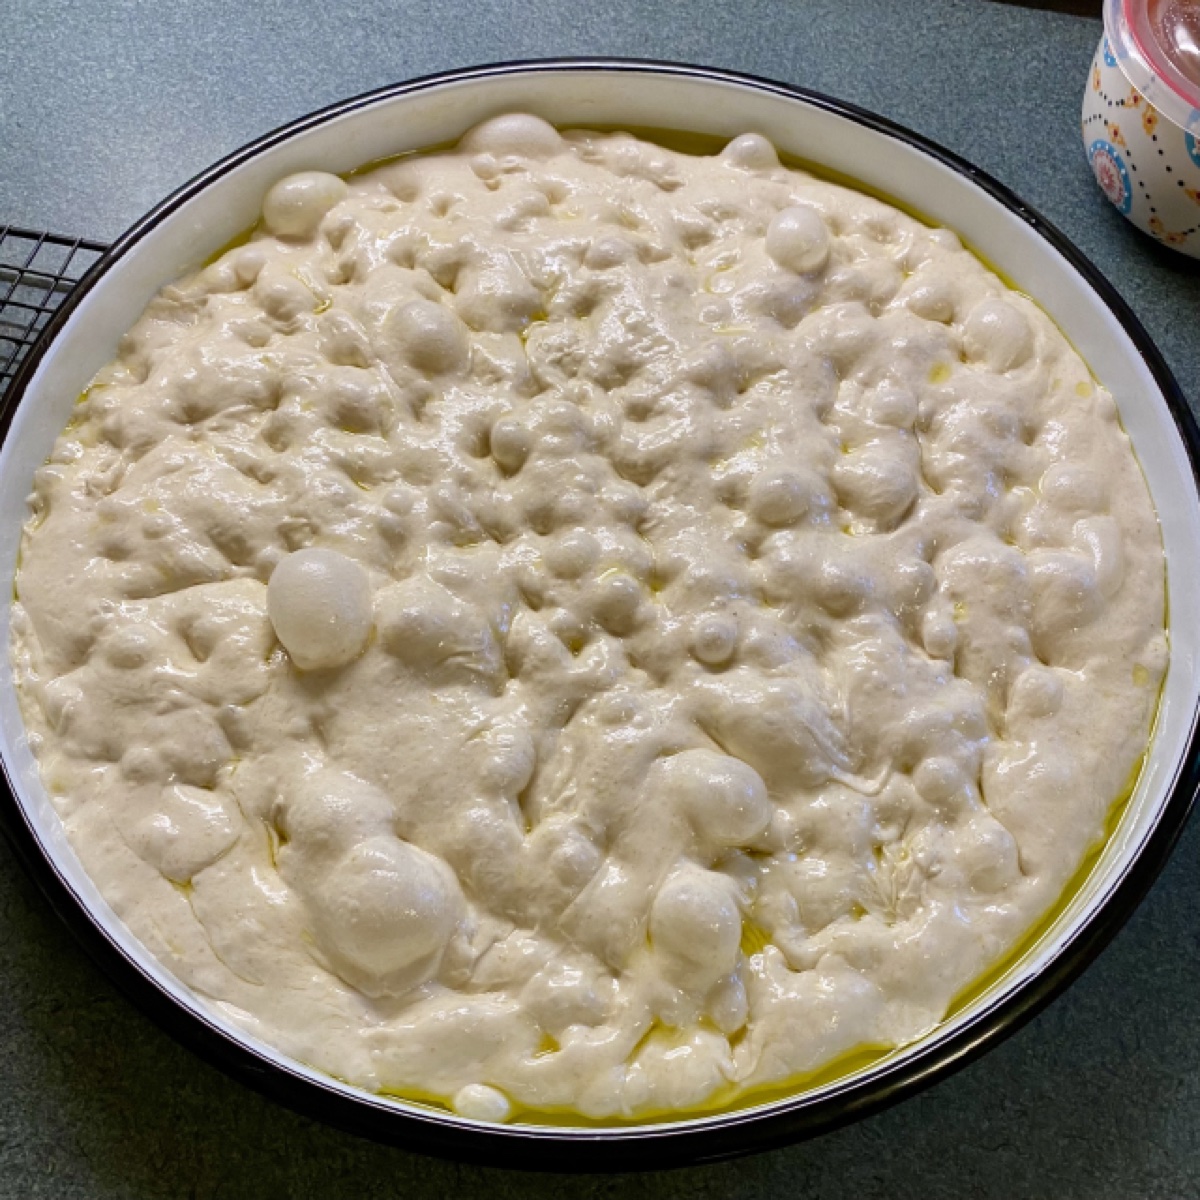
Now rest it on the counter or in another room-temperature place overnight, for 8-12 hours. Hot days in humid climates will take less time, and a cold winter’s night might take as long as 16 hours. What you’re looking for at the end of this process is a dough that’s much larger than it started, wet as batter, and bubbly.
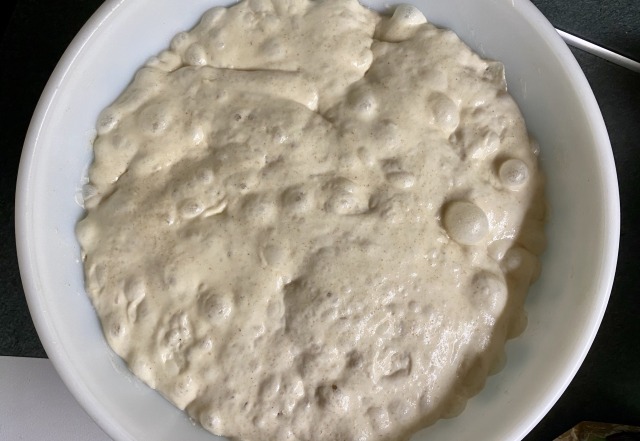
Now grab a 9 × 13 (or 10 × 14) pan and coat it well with olive oil; something like 2 tbsp of oil will do. Even coverage matters more than opulence, so use your hands or a pastry brush to get every surface and corner oily.
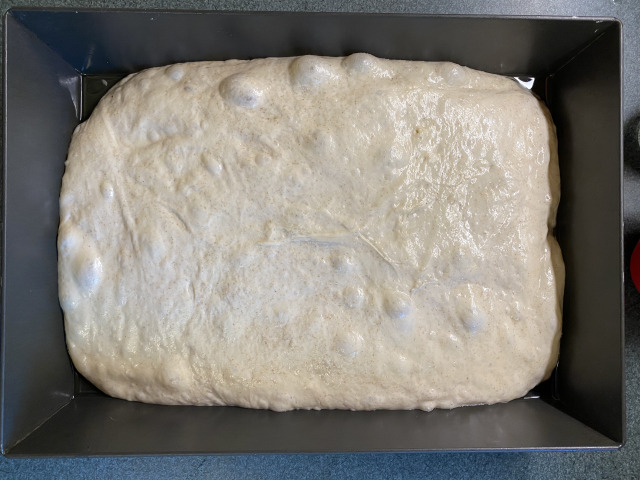
Using a flexible scraper, and trying to make it happen in as few moves as possible, scrape around the edge of the bowl, then pop the dough into the middle of the pan. It’s ok to scrape any remaining dough from the bowl on top of what’s in the pan; this is still shapeless batter, though we’re trying not to lose all those gasses that have formed inside it.
Pour some more oil on top. With very gentle and wet fingers, push the dough just so it kind of matches the pan shape. You’re not trying to make a perfect rectangle or fill the pan, you’re just giving the dough a nudge in the right direction. It’ll still be half the size of your pan.
Cover well again; if your pan has low walls, consider putting something like a larger, deeper pan over it as a cover, to ensure your lid doesn’t end up sticking to the dough, which will balloon up as it proofs. Give this second proof 3–6 hours, depending on your room’s climate.
During the last 40 minutes or so of this time, preheat your oven to 475ºF.
When the dough is almost filling the pan and it’s back to looking puffy and alive, it’s time to dimple it.
Add more oil on top (I’m not kidding here) and wet your fingers again. Now dimple by pretending to play piano, pushing into the dough gently but firmly in rows spaced an inch or so. You’re trying to create a dotted surface so the dough has a fun, uneven texture. If everything’s going well so far, you should see bubbles rising from the surface over the next minute.
Believe it or not, drizzle with oil again. Sprinkle with coarse salt and other toppings (more on that below).
Slide into the oven on a rack in the bottom-third of the oven. This placement will vary as ovens vary, so watch the evenness of your bake and adjust as needed.
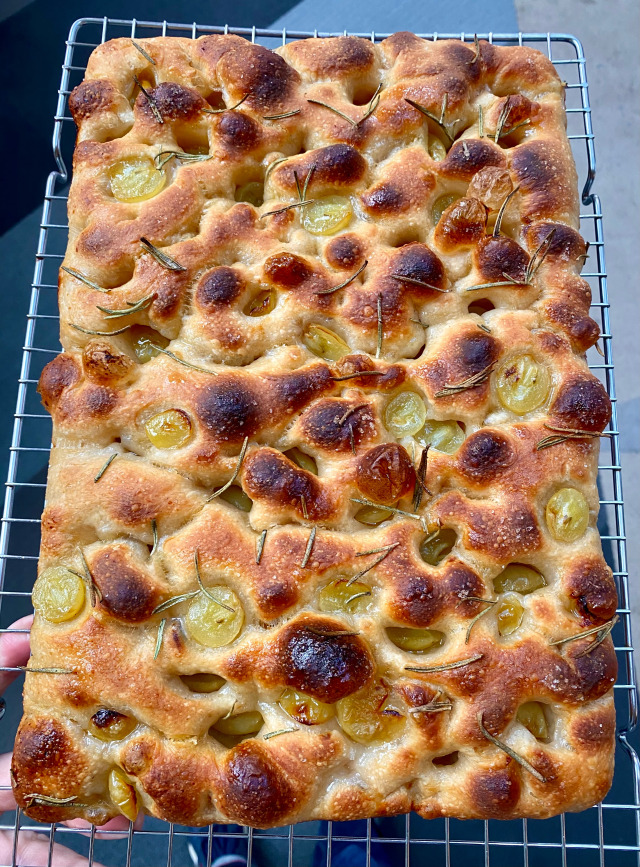
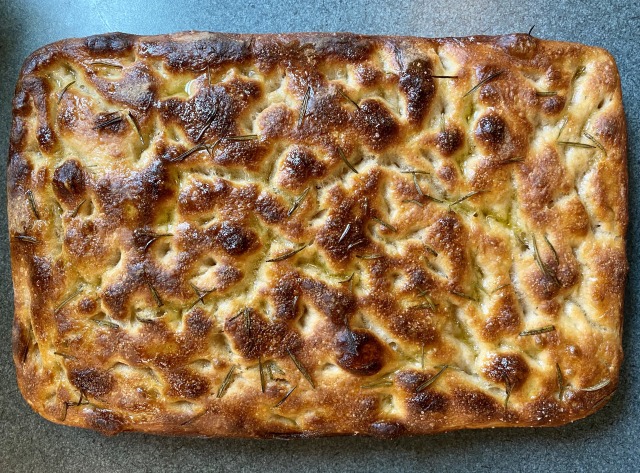
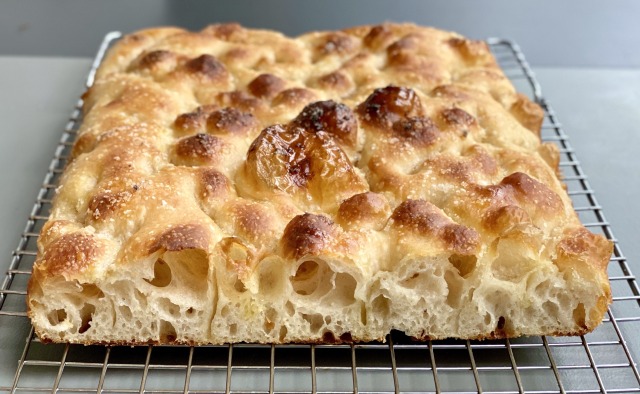
Bake for a total of 20 minutes, rotating the pan half way through. Look for a mind-blowingly beautiful golden color, with serious bubbles, some of which might char. You may have to adjust the time 5 minutes this way or that, depending.
When you remove the pan from the oven, wait a minute, then extract the bread to a cooling rack (the focaccia should be begging you to sexily slide out of its oily pan). At this point, there’s only one more thing to do:
Drizzle with olive oil again—the best stuff you’ve got in the house.
Eat as soon as 10 minutes after the bake, or later in the day if you wish. Focaccia reheats wonderfully on a rack in the oven at 300ºF or so.
LET’S CHAT SOME MORE
Wait, so we’re not kneading this or anything? No stand mixer?
Yeah, totally. Remember that whole “no-knead bread” thing? The same principle applies here: give the yeast more time, and it’ll develop the gluten etc. on its own. You’re just there to integrate the dry and wet ingredients. How easy is that?
Sourdough starter, you say? I haven’t heard that name in years…
If you’re not a Sourdough Person, don’t worry—just use 4 g (½ teaspoon) of good instant yeast. Remember that I love the Saf-Instant brand. The recipe should otherwise be pretty much the same. (You could add an extra 35 g of water and 35 g of flour to make up for the lack of sourdough mass, but no one’s gonna know.)
Wow, you used a LOT of olive oil.
Thank you! If for some reason you don’t wish to eat so much olive oil, a delicious and healthy natural ingredient, then it’s probably best not to make focaccia at all. Sorry!!
What can I put ON this puppy to make it even tastier?
Oh man, come in. Sit down. Is that olive-oil complainer gone? Good. Ok, so. Here are some things I love on focaccia:
- Cherry tomatoes, cut in half if very large
- Grapes, same strategy
- Olives
- Sweet onion, shaved to paper-thin rings
- Roasted garlic cloves
- Rosemary
- Thinly sliced zucchini
- Same approach with lemon
With the chunky toppings (tomatoes), add them in the dimpling stage, using them TO dimple (you might have to do some extra dimpling with bare fingers, still)—stuff them INTO the dough. With the flat ones (onion rings) just lay them on top of already dimpled dough.
Isn’t focaccia usually more flat and floppy? Your looks kind of craggy and dark.
*squinting* Are you that olive-oil person again? Anyway, it’s true that focaccia in Italy is often much more flat and has a smaller crumb, but I happen to deeply prefer this “rustic,” martian-landscape bread. It’s just more fun.
That said, if you want a soft and pillowy focaccia for a sandwich or to make cheesy bread, bake it at 435ºF. Add anywhere from 5 to 15 minutes to the total bake time until it looks set, though not as charred as seen above.
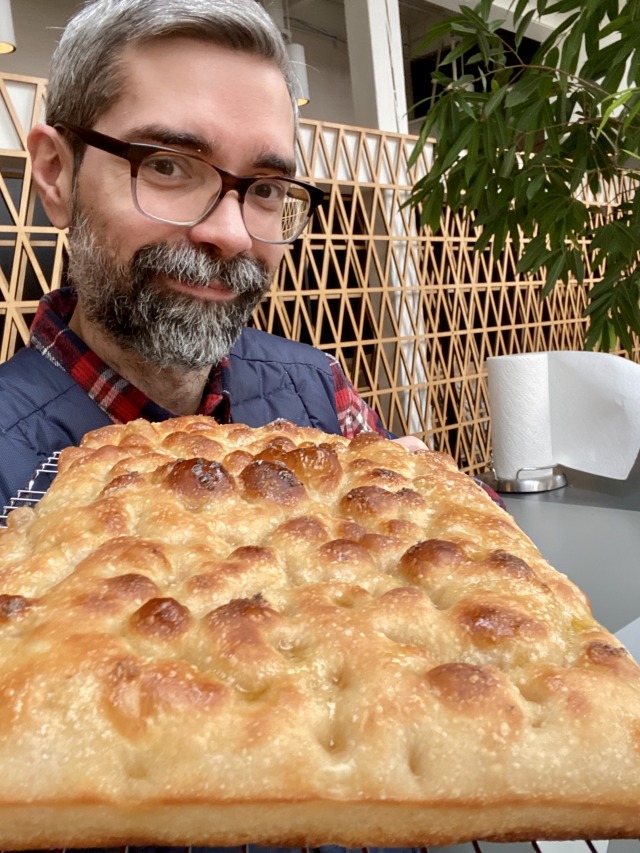
Enjoy!